Wednesday, April 12, 2023

Structured Data in Commons and wikibase software tools

VanderBot workflow to Commons
 

In my last blog post, I described a tool (CommonsTool) that I created for uploading art images to Wikimedia Commons. One of the features of that Python script was to create Structured Data in Commons (SDoC) statements about the artwork that was being uploaded, such as "depicts" (P180) and "main subject" (P921) and "digital representation of" (P6243), necessary to "magically" populate the Commons page with extensive metadata about the artwork from Wikidata. The script also added "created" (P170) and "inception" (P571) statements, which are important for providing the required attribution when the work is under copyright.

Structured Data on Commons "depicts" statements

These properties serve important roles, but one of the key purposes of SDoC is to make it possible for potential users of the media item to find it by providing richer metadata about what is depicted in the media. SDoC depict statements go into the data that is indexed by the Commons search engine, which otherwise is primarily dependent on words present in the filename. My CommonsTool script does write one "depicts" statement (that the image depicts the artwork itself) and that's important for the semantics of understanding what the media item represents. However, from the standpoint of searching, that single depicts statement doesn't add much to improve discovery since the artwork title in Wikidata is probably similar to the filename of the media item -- neither of which necessarily describe what is depicted IN the artwork.

Of course, one can add depicts statements manually, and there are also some tools that can be used to help with the process. But if you aspire to add multiple depicts statements to hundreds or thousands of media items, this could be very tedious and time consuming. If we are clever, we can take advantage of the fact that Structured Data in Commons is actually just another instance of a wikibase. So generally any tools that can make it easier to work with a wikibase can also make it easier to work with Wikimedia Commons

In February, I gave a presentation about using VanderBot (a tool that I wrote to write data to Wikidata) to write to any wikibase. As part of that presentation, I put together some information about how to use VanderBot to write statements to SDoC using the Commons API, and how to use the Wikimedia Commons Query Service (WCQS) to acquire data programatically via Python. In this blog post, I will highlight some of the key points about interacting with Commons as a wikibase and link out to the details required to actually do the interacting.

Media file identifiers (M IDs)

Wikimedia Commons media files are assigned a unique identifier that is analogous to the Q IDs used with Wikidata items. They are known as "M IDs" and they are required to interact with the Commons API or the Wikimedia Commons Query Service programmatically as I will describe below. 

It is not particularly straightforward to find the M ID for a media file. The easiest way is probably to find the Concept URI link in the left menu of a Commons page, right-click on the link, and then paste it somewhere. The M ID is the last part of that link. Here's an example: https://commons.wikimedia.org/entity/M113161207 . If the M ID for a media file is known, you can load its page using a URL of this form. 

If you are automating the upload process as I described in my last post, CommonsTool records the M ID when it uploads the file. I also have a Python function that can be used to get the M ID from the Commons API using the media filename. 

Properties and values in Structured Data on Commons come from Wikidata

Structured Data on Commons does not maintain its own system of properties. It exclusively uses properties from Wikidata, identified by P IDs. Similarly, the values of SDoC statements are nearly always Wikidata items identified by Q IDs (with dates being an exception). So one could generally represent a SDoC statement (subject property value) like this:

MID PID QID. 

Captions

Captions are a feature of Commons that allows multilingual captions to be applied to media items. They show up under the "File information" tab.

 Although captions can be added or edited using the graphical interface, under the hood the captions are the multilingual labels for the media items in the Commons wikibase. So they can be added or edited as wikibase labels via the Commons API using any tool that can edit wikibases.

Writing statements to the Commons API with VanderBot

VanderBot uses tabular data (spreadsheets) as a data source when it creates statements in a wikibase. One key piece of required information is the Q ID of the subject item that the statements are about and that is generally the first column in the table. When writing to Commons, the subject M ID is substituted for a Q ID in the table. 

Statement values for a particular property are placed in one column in the table. Since all of the values in a column are assumed to be for the same property, the P ID doesn't need to be specified as data in the row. VanderBot just needs to know what P ID is associated with that column and that mapping of column with property is made separately. So at a minimum, to write a single kind of statement to Commons (like Depicts), VanderBot needs only two columns of data (one for the M ID and one for the Q ID of the value of the property).

 Here is an example of a table with depicts data to be uploaded to Commons by VanderBot:

The qid column contains the subject M ID identifiers (for this media file). The depicts column contains the Q IDs of the values (the things that are depicted in the media item). The other three columns serve the following purposes:

- depicts_label is ignored by the script. It's just a place to put the label of the otherwise opaque Q ID for the depicted item so that a human looking at the spreadsheet has some idea about what's being depicted.

- label_en is the language-tagged caption/wikibase label. VanderBot has an option to either overwrite the existing label in the wikibase with the value in the table or ignore the label column and leave the label in Wikibase the same. In this example, we are not concerning ourselves with editing the captions, so we will use the "ignore" option. But if one wanted to add or update captions, VanderBot could be used for that.

- depicts_uuid stores the unique statement identifier after the statement is created. It is empty for statements that have not yet been uploaded.

I mentioned before that the connection between the property and the column that contains its values was made separately. This mapping is done in a YAML file that describes the columns in the table:

The details of this file structure are given elsewhere, but a few key details are obvious. The depicts_label column is designated as to be ignored.  In the properties list, the header for a column is given as value of the variable key, with a value of depicts in this example. That column has item as its value type and P180 as its property. 

As a part of the VanderBot workflow, this mapping file is converted into a JSON metadata description file and that file along with the CSV are all that are needed by VanderBot to create the SDoC depicts statements.

If you have used VanderBot to create new items in Wikidata, uploading to Commons is more restrictive than what you are used to. When writing to Wikidata, if the Q ID column for a row in a CSV is empty, Vanderbot will create a new item and if it's not, it edits an existing one. Creating new items directly via the API is not possible in Commons, because new items in the Commons wikibase are only created as a result of media uploads. So when VanderBot interacts with the Commons API, the qid column must contain an existing M ID.

After writing the SDoC statements, they will show up under the "Structured data" tab for the media item, like this:

Notice that the Q IDs for the depicts values have been replaced by their labels.

This is a very abbreviated overview of the process and is intended to make the point that once you have the system set up, all you need to write a large number of SDoC depicts statement is a spreadsheet with column for the M IDs of the media items and a column with the Q IDs of what is depicted in that media item. There are more details with linkouts to how to use VanderBot to write to Commons on a webpage that I made for the Wikibase Working Hour presentation.

Acquiring Structured Data on Commons from the Wikimedia Commons Query Service

A lot of people know about the Wikidata Query Service (WQS), which can be used to query Wikidata using SPARQL. Fewer people know about the Wikimedia Commons Query Service (WCQS) because it's newer and interests a narrower audience. You can access the WCQS at https://commons-query.wikimedia.org/ . It is still under development and is a bit fragile, so it is sometimes down or undergoing maintenance. 

If you are working with SDoC, the WCQS is a very effective way to retrieve information about the current state of the structured data. For example, it's a very simple query to discover all media items that depict a particular item, as shown in the example below. There are quite a few examples of queries that you can run to get a feel for how the WCQS might be used.

It is actually quite easy to query the Wikidata Query Service programmatically, but there are additional challenges to using the WCQS because it requires authentication. I have struggled through reading the developer instructions for accessing the WCQS endpoint via Python and the result is functions and example code that you can use to query the WCQS in your Python scripts. One important warning: the authentication is done by setting a cookie on your computer. So you must be careful not to save this cookie in any location that will be exposed, such as in a GitHub repository. Anyone who gets a copy of this cookie can act as if they were you until the cookie is revoked. To avoid this, the script saves the cookie in your home directory by default.

The code for querying is very simple with the functions I provide:

user_agent = 'TestAgent/0.1 (mailto:username@email.com)' # put your own script name and email address here
endpoint_url = 'https://commons-query.wikimedia.org/sparql'
session = init_session(endpoint_url, retrieve_cookie_string())
wcqs = Sparqler(useragent=user_agent, endpoint=endpoint_url, session=session)
query_string = '''PREFIX sdc: <https://commons.wikimedia.org/entity/>
PREFIX wd: <http://www.wikidata.org/entity/>
PREFIX wdt: <http://www.wikidata.org/prop/direct/>
SELECT DISTINCT ?depicts WHERE {
  sdc:M113161207 wdt:P180 ?depicts.
  }'''

data = wcqs.query(query_string)
print(json.dumps(data, indent=2))

The query is set in the multi-line string assigned in the line that begins query_string =. One thing to notice is that in WCQS queries, you must define the prefixes wdt: and wd: using PREFIX statements in the query prologue. Those prefixes can be used in WQS queries without making PREFIX statements. In addition, you must define the Commons-specific sdc: prefix and use it with M IDs. 

This particular query simply retrieves all of the depicts statements that we created in the example above for M113161207 . The resulting JSON is

[
  {
    "depicts": {
      "type": "uri",
      "value": "http://www.wikidata.org/entity/Q103304813"
    }
  },
  {
    "depicts": {
      "type": "uri",
      "value": "http://www.wikidata.org/entity/Q302"
    }
  },
  {
    "depicts": {
      "type": "uri",
      "value": "http://www.wikidata.org/entity/Q345"
    }
  },
  {
    "depicts": {
      "type": "uri",
      "value": "http://www.wikidata.org/entity/Q40662"
    }
  },
  {
    "depicts": {
      "type": "uri",
      "value": "http://www.wikidata.org/entity/Q235849"
    }
  }
]

The Q IDs can easily be extracted from these results using a list comprehension:

 qids = [ item['depicts']['value'].split('/')[-1] for item in data ]

resulting in this list:

['Q103304813', 'Q302', 'Q345', 'Q40662', 'Q235849']
 

Comparison with the example table shows the same four Q IDs that we wrote to the API, plus the depicts value for the artwork (Q103304813) that was created by CommonsTool when the media file was uploaded. When adding new depicts statements, having this information about the ones that already exist can be critical to avoid creating duplicate statements.

For more details about how the code works, see the informational web page I made for the Wikibase Working Hour presentation.

Conclusion

I hope that this code will help make it possible to ramp up the rate at which we can add depicts statements to Wikimedia Commons media files. In the Vanderbilt Libraries, we are currently experimenting with using Google Cloud Vision to do object detection and we would like to combine that with artwork title analysis to be able to partially automate the process of describing what is depicted in the Vanderbilt Fine Arts Gallery works whose images have been uploaded to Commons. I plan to report on that work in a future post.


Wednesday, September 7, 2022

CommonsTool: A script for uploading art images to Wikimedia Commons


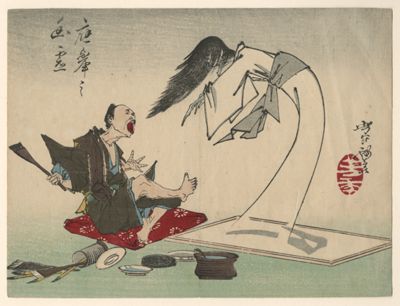
A Ghost Painting Coming to Life in the Studio of the Painter Okyō, from the series Yoshitoshi ryakuga (Sketches by Yoshitoshi). 1882 print by Tsukioka Yoshitoshi. Vanderbilt University Fine Arts Gallery 1992.083 via Wikimedia Commons. Wikidata item Q102961245

For several years, I've been working with the Vanderbilt Fine Arts Gallery staff to create and improve Wikidata items for the approximately 7000 works in the Gallery collection through the WikiProject Vanderbilt Fine Arts Gallery. In the past year, I've been focused on creating a Python script to streamline the process of uploading images of Public Domain works in the collection to Wikimedia Commons, where they will be freely available for use. I've just completed work on that script, which I've called CommonsTool, and have used it to upload over 1300 images (covering about 20% of the collection and most of the Public Domain artworks that have been imaged). 

In this post, I'll begin by describing some of the issues I dealt with and how they resulted in features of the script. I will conclude by outlining briefly how the script works.

The script is freely available for use and there are detailed instructions on GitHub for configuring and using it. Although it's designed to be usable in contexts other than the Vanderbilt Gallery, it hasn't been tested thoroughly in those circumstances. So if you try using it, I'd like to hear about your experience.

Wikidata, Commons, and structured data

If you have ever worked with editing metadata about art-related media in Wikimedia Commons, you are probably familiar with the various templates used to describe the metadata on the file page using Wiki syntax. Here's an example:

=={{int:filedesc}}==
{{Artwork
 |artist             = {{ Creator | Wikidata = Q3695975 | Option = {{{1|}}} }}
 |title              = {{en|'''Lake George'''.}}
 |description        = {{en|1=Lake George, painting by David Johnson}}
 |depicted people    =
 |depicted place     =
 |date               =
 |medium             = {{technique|oil|canvas}}
 |dimensions         = {{Size|in|24.5|19.5}}
 |institution        = {{Institution:Vanderbilt University Fine Arts Gallery}}
 |references         = {{cite web |title=Lake George |url=https://library.artstor.org/#/asset/26754443 |accessdate=30 November 2020}}
 |source             = Vanderbilt University Fine Arts Gallery
 |other_fields       =
}}

=={{int:license-header}}==
{{PD-Art|PD-old-100-expired}}

[[Category:Vanderbilt University Fine Arts Gallery]]

These templates are complicated to create and difficult to edit by automated means. In recognition of this, the Commons community has been moving towards storing metadata about the media files as structured data ("Structured Data on Commons", SDC). When media files depict artwork, the preference is to describe the artwork metadata in Wikidata rather than as wikitext on the Commons file page (as shown in the example above). 

In July, Sandra Fauconnier gave a presentation at an ARLIS/NA (Art Libraries Society of North America) Wikidata group meeting that was extremely helpful for improving my understanding of the best practices for expressing metadata about visual artworks in Wikimedia Commons. She provided a link to a very useful reference page (still under construction as of September 2022) to which I referred while working on my script. 

The CommonsTool script has been designed around two key features for simplifying management of the media and artwork metadata. The first is two very simple wikitexts: one for two-dimensional artwork and another for three-dimensional artwork. The 2D wikitext looks like this:

=={{int:filedesc}}==
{{Artwork
 |source = Vanderbilt University
}}

=={{int:license-header}}==
{{PD-Art|PD-old-100-expired}}

[[Category:Vanderbilt University Fine Arts Gallery]]

and the 3D wikitext looks like this:

=={{int:filedesc}}==
{{Art Photo
 |artwork license  = {{PD-old-100-expired}}
 |photo license    = {{Cc-by-4.0 |1=photo © [https://www.vanderbilt.edu/ Vanderbilt University] / [https://www.library.vanderbilt.edu/gallery/ Fine Arts Gallery] / [https://creativecommons.org/licenses/by/4.0/ CC BY 4.0]}}
}}

[[Category:Vanderbilt University Fine Arts Gallery]]

By comparison with the wikitext in the first example, this is clearly much simpler, but also has the advantage that there is very little metadata in the wikitext itself that might need to be updated.

The second key feature involves using SDC to link the media file to the Wikidata item for the artwork. Here's an example for the work shown at the top of this post:


In order for this strategy to work, for all artwork images the depicts (P180) and main subject (P921) values must be set to the artwork's Wikidata item (in this case Q102961245). Two dimensional artwork images should also have a "digital representation of" (P6243) value with the artwork's Wikidata item. When these claims are created, the Wikidata metadata will "magically" populate the file information summary without entering it into a wikitext template. 

The great advantage here is that when metadata are updated on Wikidata, they automatically are updated in Commons as well.

Copyright and licensing issues

One of the complicating issues that had slowed me down in developing the script was to figure out how to handle copyright and licensing issues. The images we are uploading depict old artwork that is out of copyright, but what about copyright of the images of the artwork? The Wikimedia Foundation takes the position that faithful photographic reproductions of old two-dimensional artwork lack originality and are therefore not subject to copyright. However, images of three-dimensional works can involve creativity, so those images must be usable under an open license acceptable for Commons uploads.

Wikitext tags

Unlike other metadata properties about a media item, the copyright and licensing details cannot (as of September 2022) be expressed only in SDC. They must be explicitly included in the file page's wikitext. 

 As shown in the example above, I used the license tags

{{PD-Art|PD-old-100-expired}}

for 2D artwork. The PD-Art tag asserts that the image is not copyrightable for the reason given above and PD-old-100-expired asserts that the artwork is not under copyright because it is old. When these tags are used together, they are rendered on the file page like this:


The example above for 3D artworks uses separate license tags for the artwork and the photo. The artwork license is PD-old-100-expired as before, and the photo license I used was

{{Cc-by-4.0 |1=photo © [https://www.vanderbilt.edu/ Vanderbilt University] / [https://www.library.vanderbilt.edu/gallery/ Fine Arts Gallery] / [https://creativecommons.org/licenses/by/4.0/ CC BY 4.0]}}

There are a number of possible licenses that can be used for both the photo and artwork and they can be set in the CommonsTool configuration file. Since the CC BY license requires attribution, I used the explicit credit line feature to make clear that it's the photo (not the artwork) that's under copyright and to provide links to Vanderbilt University (the copyright holder) and the Fine Arts Gallery. Here's how these tags are rendered on the file page of an image of a 3D artwork:


Using the format

{{Art Photo
 |artwork license  = {{artLicenseTag}}
 |photo license    = {{photoLicenseTag}}
}}

in the wikitext is great because it creates separate boxes that clarify that the permissions for the artwork are distinct from the permissions for the photo of the artwork.

Structured data about licensing

As noted previously, it's required to include copyright and licensing information in the page wikitext. However, file pages must also have certain structured data claims related to the file creator, copyright, and licensing or they will be flagged.

In the case of 2D images where the PD-Art tag was used, there should be a "digital representation of" (P6243) claim where the value is the Q ID of the Wikidata item depicted in the media file. 

In the case of 3D images, they should not have a P6243 claim, but should have values for copyright status (P6216) and copyright license (P275). If under copyright, they should also have values for creator (P170, i.e. photographer) and inception (P571) date so that it can be determined to whom attribution should be given and when the copyright may expire. Keep in mind that for artwork SDC metadata is generally about the media file and not the depicted thing. So similar information about the depicted artwork would be expressed in the Wikidata item about the artwork, not in SDC. 

Although not required when the PD-Art tag is used, it's a good idea to include the creator (photographer) and inception date of the image in the SDC metadata for 2D works. It's not yet clear to me whether a copyright status value should be provided. I suppose so, but if it's directly asserted in the SDC that the work is in the Public Domain, you are supposed to use a qualifier to indicate the reason, and I'm not sure what value would be used for that. I haven't seen any examples illustrating how to do that, so for now, I've omitted it.

To see examples of how this looks in practice see this example for 2D and this example for 3D. After the page loads, click on the Structured Data tab below the image.

What the script does: the Commons upload

The Commons upload takes place in three stages. 

First, CommonsTool acquires necessary information about the artwork and the image from CSV tables. One key piece of information is what image or images to be uploaded to Commons are associated with a particular artwork (represented by a single Wikidata item). The main link from Commons to Wikidata is made using a depicts (P180) claim in the SDC and the link from Wikidata to Commons is made using an image (P18) claim.

Miriam by Anselm Feuerbach. Public Domain via Wikimedia Commons

It is important to know whether there are more than one image associated with the artwork. In the source CSV data about images, the image to be linked from Wikidata is designated as "primary" and additional images are designated as "secondary". 


Both primary and secondary images will be linked from Commons to Wikidata using a depicts (P180) claim, but it's probably best for only the primary image to be linked from Wikidata using an image (P18) claim. Here is an example of a primary image page in Commons and here is an example of a secondary image page in Commons. Notice that the Wikidata page for the artwork only displays the primary image.

The CommonsTool script also constructs a descriptive Commons filename for the image using the Wikidata label, any sub-label particular to one of multiple images, the institution name, and the unique local filename. There are a number of characters that aren't allowed, so CommonsTool tries to find them and replace them with valid characters. 

The script also performs a number of optional screens based on copyright status and file size. It can skip images deemed to be too small and will also skip images whose file size exceeds the API limit of 100 Mb. (See the configuration file for more details.)

 The second stage is to upload the media file and the file page wikitext via the Commons API. Commons guidelines state that the rate of file upload should not be greater than one upload per 5 seconds, so the script introduces a delay of necessary to avoid exceeding this rate. If successful, the script moves on to the third stage and if not, it logs an error and moves to the next media item.

In the third stage, SDC claims are written to the API in a manner similar to how claims are written to Wikidata. The claims upload function respects the maxlag errors from the server and delays the upload if the server is lagged due to high usage (although this rarely seems to happen). If the SDC upload fails, it logs an error, but the script continues in order to record the results of the media upload in the existing uploads CSV file.


 The links from the Commons image(s) to Wikidata are made using SDC statements, which results in a hyperlink in the file summary (the tiny Wikidata flag). However, the link in the other direction doesn't get made by CommonsTool. 

The CSV file where existing uploads are recorded contains an image_name column and the primary values for "primary" images in that column can be used as values for the image (P18) property on the corresponding Wikidata artwork item page. After creating that claim, the primary image will be displayed on the artwork's Wikidata page:

Making this link manually can be tedious, so there is a script that will automatically transfer these values into the appropriate column of a CSV file that is set up to be used by the VanderBot script to upload data to Wikidata. In production, I have a shell script that runs CommonsTool, then the transfer script, followed by VanderBot. Once that shell script has finished running, the image claim will be present on the appropriate Wikidata page.

International Image Interoperability Framework (IIIF) functions

One of our goals at the Vanderbilt Libraries (of which the Fine Arts Gallery is part) is to develop the infrastructure to support serving images using the International Image Interoperability Framework (IIIF). To that end, we've set up a Cantaloupe image server on Amazon Web Services (AWS). The setup details are way beyond the scope of this web post, but now that we have this capability, we want to make the images that we've uploaded to Commons also be available as zoomable high-resolution images via our IIIF server. 

For that reason, the CommonsTool script also has the capacity to upload images to the IIIF server storage (an AWS bucket) and to generate manifests that can be used to view those images. The IIIF functionalities are independent of the Commons upload capabilities -- either can be turned on or off. However, for my workflow, I do the IIIF functions immediately after the Commons upload so that I can use the results in Wikidata as I'll describe later. 

Source images

One of the early things that I learned when experimenting with the server is that you don't want to upload large, raw TIFF files (i.e. greater than 10 MB). When a IIIF viewer tries to display such a file, it has to load the whole file, even if the screen area is much smaller that the entire TIFF would be if displayed at full resolution. This takes an incredibly long time, making viewing of the files very annoying. The solution to this is to convert the TIFF files into tiled pyramidal TIFFs. 

When I view one of these files using Preview on my Mac, it becomes apparent why they are called "pyramidal". The TIFF file doesn't contain a single image. Rather, it contains a series of images that are increasingly small. If I click on the largest of the images (number 1), I see this:


and if I click on a smaller version (number 3), I see this:


If you think of the images as being stacked with the smaller ones on top of the larger ones, you can envision a pyramid. 

When a client application requests an image from the IIIF server, the server looks through the images in the pyramid to find the smallest one that will fill up the viewer and sends that. If the viewer zooms in on the image, requiring greater resolution, the server will not send all of the next larger image. Since the images in the stack are tiled, it will only send the particular tiles from the larger, higher resolution image that will actually be seen in the viewer. The end result is that the tiled pyramidal TIFFs load much faster because the IIIF server is smart and doesn't send any more information than is necessary to display what the user wants to see.

The problem that I faced was how to automate the process of generating a large number of these tiled pyramidal TIFFs. After thrashing with various Python libraries, I finally ended up using the command line tool ImageMagick and calling it from a Python script using the os.system() function. The script I used is available on GitHub. 

Because the Fine Arts Gallery has been working on imaging their collection for over 20 years, the source images that I'm using are in a variety of formats and sizes (hence the optional size screening criteria in the script to filter out images that have too low resolution). The newer images are high resolution TIFFs, but many of the older images are JPEGs or PNGs. So one task of the IIIF server upload part of the CommonsTool script is to sort out whether to pull the files from the directory where the pyramidal TIFFs are stored, or the directory where the original images are stored. 

Once the location of the correct images are identified, the script uses the boto3 module (the AWS software development kit or SDK), to initiate the upload to the S3 bucket as part of the Python script. I won't go into the details of setting up and using credentials as that is described well in the AWS documentation. 

Once the file is uploaded, it can be directly accessed using a URL constructed according to the IIIF Image API standard. Here's a URL you can play with:

https://iiif.library.vanderbilt.edu/iiif/3/gallery%2F1992%2F1992.083.tif/full/!400,400/0/default.jpg

If you adjust the URL (for example replacing the 400s with different numbers) according to the API 2.0 URL patterns, you can make the image display at different sizes directly in the browser.

IIIF manifests

The real reason for making images available through a IIIF server is to display them in a viewer application. One such application is Mirador. A IIIF viewer uses a manifest to understand how the image or set of images should be displayed. CommonsTool generates very simple IIIF manifests that display each image in a separate canvas, along with basic metadata about the artwork. To see what the manifest looks like for the image at the top of this post, go to this link. 

IIIF manifests are written in machine-readable Javascript Object Notation (JSON), so they are not intended to be understood by humans. However, when the manifest is consumed by a viewer application, a human can use controls such as pan, zoom, and buttons to manipulate the image or to move to another canvas that displays a different image. The Mirador project provides an online IIIF viewer that can be used to view images described by a manifest. This link will display the manifest from above in the Mirador online viewer. 

One nice thing about providing a IIIF manifest is that it allows multiple images of the same work to be viewed in the same viewer. For example, there might be multiple pages of a book, or the front and back sides of a sculpture. I'm still learning about constructing IIIF manifests, so I haven't done anything fancy yet with respect to generating IIIF manifests in the CommonsTool script. However, the script does generate a single manifest describing all of the images depicting the same artwork. The image designated as "primary" is shown in the initial view and any other images designated as "secondary" are shown in other canvases that can be selected using the viewer display options or be viewed sequentially using the buttons at the bottom of the viewer. Here is an example showing how the manifest for the primary and secondary images in an earlier example put the front and back images of a manuscript page in the same viewer window. 

IIIF in Wikidata

Wikidata has a property "IIIF manifest" (P6108) that allows an item to be linked to a IIIF manifest that displays depictions of that item. The file where existing uploads are recorded includes a iiif_manifest column that contains the manifest URLs for the works depicted by the images. 

Those values can be used to create IIIF manifest (P6108) claims for an item in Wikidata:

Because doing this manually would be tedious, the iiif_manifest values can be automatically transferred to a VanderBot-compatable CSV file using the same transfer script used to transfer the image_name.

In itself, adding a IIIF manifest claim isn't very exciting. However, Wikidata supports a user script that will display an embedded Mirador viewer anytime an item has a value for P6108. (For details on how to install that script, see this post.) With the viewer enabled, opening a Wikidata page for a Fine Arts Gallery item with images will display the viewer at the top of the page and a user can zoom in or use the buttons at the bottom to move to another image of the same artwork.

This is really nice because if only the primary image is linked using the image property, users would not necessarily know that there are other images of the object in Commons. But with the embedded viewer, the user can flip through all of the images of the item that are in Commons using the display features of the viewer, such as thumbnails.


Using the script

Although I wrote this script primarily to serve my own purposes, I tried to make it clean and customizable enough that someone with moderate computer skills should also be able to use it. The only installation requirements are Python and several modules that aren't included in the standard library. It should not generally be necessary to modify the script to use it -- most customizing should be possible by changing the configuration file. 

If the script is only used to write files to Commons, it's operation is pretty straightforward. If you want to combine uploading image files to Commons with writing the image_names and iiif_manifest values to Wikidata, it's more complicated. You need to get the transfer_to_vanderbot.py script working and then learn how to operate VanderBot. There are details instructions, videos, etc. to do that on the VanderBot landing page.

What's next?

There are still a few more Fine Arts Gallery images that I need to upload after doing some file conversions, checking out some copyright statuses, and wranging some data for multiple files that depict the same work. However, I'm quite excited about developing better IIIF manifests that will make it possible to view related works in the same viewer. Having so many images in Commons now also makes it possible to see the real breadth of the collection by viewing the Listeria visualizations on the tabs of the WikiProject Vanderbilt Fine Arts Gallery website. I hope soon to create more fun SPARQL-based visualizations to add to those already on the website landing page.

Saturday, June 11, 2022

Making SPARQL queries to Wikidata using Python


"Welding sparkles" by Dhivya dhivi DJ, CC BY-SA 4.0, via Wikimedia Commons

Background

This is actually a sort of followup post to my most popular blog post: "Getting Data Out of Wikidata using Software", which has had about 6.5K views since 2019. That post was focused on the variety of query forms you could use and talked a lot about using Javascript to build web pages that acquired data from Wikidata dynamically. However, I did provide a link to some Python code, which included the line

r = requests.get(endpointUrl, params={'query': query}, headers={'Accept': 'application/sparql-results+json'})

for making the actual query to the Wikidata Query Service via HTTP GET. 

Since that time, I've used some variation on that code in dozens of Python scripts that I've written to grab data from Wikidata. In the process, I experienced some frustration when things did not behave as I had expected and when I got unexpected errors from the API. My goal for this post is to describe some of those problems and how I solved them. I'll also provide a link to the "Sparqler" Python class that I wrote to make querying simpler and more reliable, along with some examples of how to use it to do several types of queries.

 Note: SPARQL keywords are case insensitive. Although you often see them written in ALL CAPS in examples, I'm generally too lazy to do that and tend to use lower case, as you'll see in most of the examples below.

The Sparqler class

For those of you who don't care about the technical details, I'll cut right to the chase and tell you how to make queries to Wikidata using the code. You can access the code in GitHub here.  I should note that the code is general-purpose and can be used with any SPARQL 1.1 compliant endpoint, not just the Wikidata Query Service (WDQS). This includes Wikibase instances and installations of Blazegraph, Fuseki, Neptune, etc. The code also supports SPARQL Update for loading data into a triplestore, but that's the topic of another post.

To use the code, you need to import three modules: datetime, time, and requests. The requests module isn't included in the standard Python distribution, so you may need to install it with PIP if you haven't already. If you are using Jupyter notebooks through Anaconda, or Colab notebooks, requests will probably already be installed. Copy the code from "class Sparqler:" through just before the "Body of script" comment near the bottom of the file, and paste it near the top of your script. 

To test the code, you can run the entire script, which includes code at the end with an example of how to use the script. If you only run it once or twice, you can use the code as-is. However, if you make more than a few queries, you'll need to change the user_agent string from the example I gave to your own. You can read about that in the next section. 


 The body of the script has four main parts. Lines 238 through 256 create a value for the text query_string that gets sent to the WDQS endpoint. Lines 259 and 260 instantiate a Sparqler object called wdqs. Line 261 sends the query string that you created to the endpoint and returns the SELECT query results as a list of dictionaries called data. The remaining lines check for errors and display the results as pretty JSON (the reason for importing the json module at the top of the script). If you want to see the query_string as constructed or the raw response text from the endpoint, you can uncomment lines 257 and 266.

Here's what the response looks like:

[
  {
    "item": {
      "type": "uri",
      "value": "http://www.wikidata.org/entity/Q102949359"
    },
    "label": {
      "xml:lang": "en",
      "type": "literal",
      "value": "\"I Hate You For Hitting My Mother,\" Minneapolis"
    }
  },
  {
    "item": {
      "type": "uri",
      "value": "http://www.wikidata.org/entity/Q102961315"
    },
    "label": {
      "xml:lang": "en",
      "type": "literal",
      "value": "A Picture from an Outline of Women's Manners - The Wedding Ceremony"
    }
  },
  {
    "item": {
      "type": "uri",
      "value": "http://www.wikidata.org/entity/Q1399"
    },
    "label": {
      "xml:lang": "en",
      "type": "literal",
      "value": "Niccol\u00f2 Machiavelli"
    }
  }
]

It's in the standard SPARQL 1.1 JSON results format, so if you write code to extract the results from the data list of dictionaries, you can use it with the results of any query.

Features of the code

For those of you who are interested in knowing more about the code and the rationale behind it, read the following sections. If you just want to try it out, skip to the "Options for querying" section.

The User-Agent string

Often applications that request data from an API are requested to identify themselves as in indication that they aren't bad actors and to allow the API maintainers to contact the developers if the application is doing something the API maintainers don't like. In the case of the Wikimedia Foundation, they have adopted a User-Agent policy that requires that an HTTP User-Agent header be sent with all requests to their servers. This policy is not universally enforced, and I'm not sure whether it's enforced at all for the WDQS, but if you are writing a script that is making repeated queries at a high rate of speed, you should definitely supply a User-Agent header that identifies your application (and you) in the event that it is suspected to be a denial of service attack. 

The details of what they would like developers to include in the string are given on the policy page, but the TLDR is that you should have a name for the "application" (your script) and either your email address or the URL of a page that describes your project. The value given in lines 259 and 260 of the body of the script for the user_agent variable can be used as a template. When instantiating the Sparqler object, the string MUST be passed in as the value of the useragent argument if the endpoint URL given as the value of the endpoint argument is https://query.wikidata.org/sparql (the default if no endpoint argument is given). If you don't provide one, the script will exit.

The sleep argument

When you create a Sparqler object, you can choose to supply a value (in seconds) for the sleep argument. If none is supplied, it defaults to 0.1 s. Each time a query is made, the script pauses execution for the length of time specified. The rationale for the default of 0.1 s for the WDQS is similar to the previous section -- you don't want the WDQS operators to think you are a bad actor if you are hitting the endpoint repeatedly without delay. If you are reading from a localhost endpoint, you can set the value of sleep to zero. 

While I'm on the topic of being a courteous WDQS user, I would like to point out that often repetitive querying can be avoided if you use a "smarter" query. In the example code, I wanted to discover the Q IDs of three labels. I could have inserted the label value in the query as a literal in the position of ?value, e.g.

?item rdfs:label|skos:altLabel "尼可罗·马基亚维利"@zh.

then put the .query() method inside a loop that runs three times. However, instead in the script I used a loop to create an VALUES clause to enumerate the possible values of ?value . I still get the same information, but using the VALUES method only requires one interaction with the Query Service instead of three. For a small number like this, it's not that important, but I've sent queries with hundreds or thousands of values, and there the difference is significant.

GET vs. POST

This brings me to another important thing that I learned the hard way about interacting with SPARQL endpoints programmatically. If you drill down in the SPARQL 1.1 Protocol specification (which I doubt that anyone but me typically does!), you'll see that there are three options for sending queries via HTTP: one using GET and two using POST. When I first started running queries from scripts, I tended to use the GET method because it seemed simpler -- after URL-encoding the query just gets attached to the end of the URL as the value of a query parameter. However, what I discovered once I started making really long queries (like the one I previously described with thousands of VALUES) was that you can fairly easily exceed the length limits of a URL allowed by the server (something in the neighborhood of 5K to 15K characters). Once I discovered that, I switched to using POST since the query is passed as the message body and therefore has no particular length limit. 

So why would you ever need to use GET? In some cases, a SPARQL endpoint will only support GET requests because the endpoint is read-only. In cases where a SPARQL service supports both Query and Update, a quick-and-dirty way to restrict writing to the triplestore using Update (which must be done using POST) is to disallow any un-authenticated POST requests. Another case is services like AWS Neptune that have separate read-only endpoints whose access is separate from the endpoint that supports writing. A read-only endpoint would only support GET requests. 

For these reasons, you can specify that the Sparqler object use GET by providing a value of "get" for the method argument. Otherwise it defaults to POST.

UTF-8 support

If the literals that you are using only contain Latin characters, it doesn't really matter that much how you do the querying. However, a lot of projects I work on either involve languages with non-Latin character sets, or include characters with diacritics that aren't in the ASCII character set. Despite my best efforts to enforce UTF-8 encoding everywhere, I was still having queries that would fail to match labels in Wikidata that I knew should match. After wasting a bunch of time troubleshooting, I finally figured out the fix. 

As I mentioned earlier, the SPARQL 1.1 Protocol Recommendation provides two ways to send queries. The simplest one is to just send the query as text without URL-encoding as the message body. That's awesome for testing because you can just paste a query into the message text box of Postman and if you use the right Content-Type header, you can send the query with the click of a button. I assumed that as long as the text was all UTF-8, I would be fine. However, using this option was actually the cause of the problems I was having with match failures. When I switched to the other POST method (which URL-encodes the query string), my matching problems disappeared. For that reason, my script only uses the "query via URL-encoded POST" option. 

", ', and """ quoting for literals

I learned early on that in SPARQL you can use either double or single quotes for literals in queries. That's nice, because if you have a string containing a single quote like "don't", you can enclose it in double quotes and a string containing double quotes like 'say "hi" for me', you can enclose it in single quotes. But what if you have 'Mother said "don't forget to brush your teeth" to me.', which contains both double and single quotes? Also, in the situation of inserting strings into the query string using variables, you can 't know in advance what kind or kinds of quotes a string might contain. 

This problem frustrated me for quite some time and I experimented with checking strings for both kinds of quotes, replacing double quotes with singles, escaping quotes in various ways, but none of these approaches worked and my scripts kept crashing because of quote mismatches. 

Finally, I resorted to (you guessed it) reading the SPARQL 1.1. Query specification and there was the obvious (to Python users) answer in section 4.1.2: enclose the literals in sets of three quotes. I don't know why I didn't think of trying that. Note that in line 246 of the script, triple single-quotes are used to enclose the literals. Thus the script can handle both of the example English strings: the one with double quotes around the first part of the label and the label that includes "Women's" with an apostrophe.

After solving the quote and UTF-8 problems, my scripts now reliably handle literals that contain any UTF-8 characters.

Options for querying

The query in the code example uses the SELECT query form. This is probably the most common type of SPARQL query, but others are possible and Sparqler objects support any query form option. Depending on the chosen form of the query, there are also several possible response formats. Since we are talking about Python here, the most convenient response format is JSON, since it can easily be converted into a complex Python data structure. But in some situations, another format may be more convenient.

Query form

The query form is specified using the form keyword argument of the .query() method. It may seem a bit strange to specify the query form as an argument of the method when the query form is determined by the text of the query itself, but doing so allows the script to control the default format of the response and whether the raw response is processed prior to being returned from the method. For SELECT and ASK, the default response serialization is set to JSON. For the DESCRIBE and CONSTRUCT query forms that return graphs, the default serialization is Turtle. 

SELECT

The default query form is SELECT, so it isn't necessary to provide a form argument to use it. That's convenient, since it's probably the most commonly used form. The raw JSON response (which you can view as the value of the .response attribute of the Sparqler object, e.g. wdqs.response) from the endpoint is structured in a more complicated way that is required to just get the results of the query. The results list is actually the value of a bindings key that forms an object that's the value of a results key, like this:

{
  "head" : {
    "vars" : [ "item", "label" ]
  },
  "results" : {
    "bindings" : [ {
      "item" : {
        "type" : "uri",
        "value" : "http://www.wikidata.org/entity/Q102949359"
      },
...
      }
    } ]
  }
}

For convenience, when handling SELECT queries with the default JSON serialization, the script converts the raw JSON to a complex Python data object, then extracts the results list that's nested as the value of the bindings key and returns that as the value of the .query() method. That produces the result shown in the example shown earlier in the post.  

Here's an example that prints Douglas Adams' (Q42) name in all available languages:

query_string = '''select distinct ?label ?language where {
wd:Q42 rdfs:label ?label.
bind ( lang(?label) AS ?language )
}
order by ?language'''
names = wdqs.query(query_string)
for name in names:
    print(name['language']['value'], name['label']['value'])

The loop iterates through all of the items in the results list and pulls the value for each variable.  This structure: item['variableName']['value'] is consistent for all SELECT queries where variableName is the string you used for that variable in the query (e.g. ?variableName).

ASK

When the ASK query form is chosen, the result is a true or false, so the raw response is processed to return a Python boolean as the response value. That allows you to directly control program flow based on whether a particular graph pattern has any solutions, like this:

label_string = '尼可罗·马基亚维利'
language = 'zh'

query_string = '''ask where {
  ?entity rdfs:label """'''+ label_string + '"""@' + language + '''.
      }'''

if wdqs.query(query_string, form='ask'):
    print(label_string, 'is in Wikidata')
else:
    print('Could not find', label_string, 'in Wikidata')

I use this kind of query to check whether label/description combinations that I plan to use for new Wikidata items have already been used. If you try to create a new item that has the same label and description as an existing item, the Wikidata API will return an error message and refuse to create the item. So it's better to query ahead of time so that you can change either the label or description to make it unique. Here's some code that will perform that check for you:

label_string = 'Italian Lake Scene'
description_string = 'painting by Artist Unknown'

query_string = '''ask where {
  ?item rdfs:label """'''+ label_string + '''"""@en.
  ?item schema:description """'''+ description_string + '''"""@en.
      }'''

if wdqs.query(query_string, form='ask'):
    print('There is already an item in Wikidata with')
    print('label:', label_string)
    print('description:', description_string)
    print('The label or description must be changed before uploading.')

DESCRIBE

The DESCRIBE query form is probably the least commonly used SPARQL query form. Its behavior is somewhat dependent on the implementation. Blazegraph, which is the application that underlies the WDQS, returns all of the triples that include the resource that is the solution to the query. The simplest kind of DESCRIBE query just specifies the IRI of the resource to be described. Here's an example that will return all of the triples that provide some kind of information about Douglas Adams (Q42):

query_string = 'describe wd:Q42'
description = wdqs.query(query_string, form='describe')

description is a string containing the triples in Turtle serialization. That string could be saved as a file and loaded into an application that knows how to parse Turtle.

CONSTRUCT

 CONSTRUCT queries are similar to DESCRIBE in that they produce triples. The triples are those that conform to a graph pattern that you specify. For example, this query will produce all of the triples (serialized as Turtle) that are direct claims about Douglas Adams.

query_string = '''construct {wd:Q42 ?p ?o.} where {
wd:Q42 ?p ?o.
?prop wikibase:directClaim ?p.
}'''
triples = wdqs.query(query_string, form='construct')
print(triples)

This might be useful to you if you want to load just those triples into a triplestore.

Response formats

Because of the ease with which JSON can be converted directly to an analogously structured complex Python data object, Sparqler objects default to JSON as the response format for SELECT queries. For the two query forms that return triples (DESCRIBE and CONSTRUCT), the default is Turtle. ASK defaults to JSON, from which a Python boolean is extracted. However, these response formats can be overridden using the mediatype keyword argument in the .query() method if desired.

The mediatype argument for some other possible response formats for SELECT are:

application/sparql-results+xml for XML

text/csv for CSV tabular data

For non-JSON response serializations, the return value of the .query() method is the raw text from the endpoint. That may be useful if you want to save the XML for use with some XML processing language like XQuery. It also makes it super simple to save the output as a CSV file with a few lines of code, like this:

data = sve.query(query_string, mediatype='text/csv')
with open('graph_dump.csv', 'wt', encoding='utf-8') as file_object:
    file_object.write(data)

Triple output from DESCRIBE and CONSTRUCT can be serialized in other formats using these values of  the mediatype argument:

application/rdf+xml for XML

application/n-triples for N-Triples

Monitoring the status of the query

 The verbose keyword argument can be used to control whether you get printed feedback to monitor the status of the query. A False value (the default) suppresses printing. Supplying a True value prints a notification that the query has been requested and another when a response has been received, including the time to complete the query. This may be helpful during debugging or if the queries take a long time to execute. For small, routine queries, you probably want to turn this off. Note: the second notification takes place after the sleep delay, so the reported response time includes that delay.

 FROM and FROM NAMED

The SPARQL 1.1 Protocol specification provides a mechanism for specifying graphs to be included in the default graph using a request parameter rather than by using the FROM and FROM NAMED keywords in the text of the query itself. Sparqler supports this mechanism through the default and named arguments. Given that this is an advanced feature and that the WDQS triplestore does not have named graphs, I won't say more about this here. However, I'm planning talk about this feature in a future post about the Vanderbilt Libraries' new Neptune triplestore. For more details, see the doc strings in the code.

Detecting errors

Detecting errors depends on how errors are reported by the SPARQL query service. In the case of Blazegraph (the service on which the WDQS is based), errors are reported as unformatted text in the response body. This is not the case with every SPARQL service -- they may report errors by some different mechanism, such as a log that must be checked. 

Because the main use cases of the Sparqler class are SELECT and ASK queries to the WDQS, errors can be detected by checking whether the results are JSON or not (assuming the default JSON response format is used). When SELECT queries return JSON, the code tries to convert the response from JSON to a Python object. If it fails, it returns a None object. You can then detect a failed query by checking whether the value is None and if it is, you can try to parse out the error message string (provided as the value of the .response attribute of the Sparqler object, e.g. wdqs.response), or just print it for the user to see. Here is an example:

 query_string = '''select distinct ?p ? where {
wd:Q42 ?p ?o.
}
limit 3'''
data = wdqs.query(query_string)
if data is None:
    print(wdqs.response)
else:
    print(data)

The example intentionally omits the name of the second variable (?o) to cause the query to be malformed. If you run this query, None will be returned as the value of data, and the error message will be printed. If you add the missing "o" after the question mark and re-run the query, you should get the query results. 

Note that this mechanism detects actual errors and not a negative query result. For example, a select query with no matches will return an empty list ([]), which a negative result, not an error. The same is true for ASK queries that evaluate as False when there are no matches. That's why the code is written "if data is None:" rather than "if data:", which would evaluate as True if there were matches (non-empty list or True value) but as False for a either an error (a value of None) or no matches (an empty list or False value).  The point is that "no matches" result should be handled differently than an error in your code, and that's why the code if data is None: is used.

For other query forms (DESCRIBE and CONSTRUCT) and response formats other than JSON, the .query() method simply returns the response text. So I leave it to you to figure out how to differentiate between errors and valid responses (maybe search for "ExecutionException" in the response string?).

SPARQL Update support

The Sparqler class supports changing graphs in the triplestore using SPARQL Update if the SPARQL service supports that. This is done using the .update() method and two more specific types of Update operations: .load() and .drop() . However, since changes to the data available on the WSQS triplestore must be made through the Wikidata API and not through SPARQL Update, I won't discuss these features in this post. I'm planning to describe them in more detail in an upcoming post where I talk about our Neptune triplestore. Until then, you can look at the doc strings in the code for details.